
Buying Guide: Best Shower Wall Kits for Bathrooms
Choosing shower wall kits often feels overwhelming with so many options for size, material, and installation. Many buyers worry about fitting the kit into their space, ensuring it lasts, or tackling the install themselves. This guide breaks down the key factors to help you pick a practical solution that matches your bathroom setup and budget.
Size and Dimensions
Shower wall kits come in standard sizes like 32x32 inches, 34x34 inches, or larger neo-angle designs. Getting the dimensions right prevents gaps or overcrowding in your bathroom.
- Measure your existing shower base or alcove precisely, adding 1-2 inches for adjustments.
- If space is tight, opt for corner units; for bigger bathrooms, consider linear panels up to 60 inches wide.
- Avoid oversized kits in small spaces—they can make the room feel cramped and complicate plumbing alignment.
Material and Durability
The material affects how well the walls hold up to daily moisture, cleaning, and impacts. Acrylic and fiberglass are common for their balance of strength and affordability.
- Choose acrylic if you want scratch-resistant surfaces that stay glossy longer.
- Fiberglass works well for budget setups but may show wear faster with heavy use.
- If your family includes kids or pets, prioritize thicker walls (0.25 inches or more) to resist dents.
In humid climates, look for molded designs with reinforced edges to minimize cracking over time.
Installation Requirements
Most kits are designed for DIY installation, but complexity varies. Proper prep reduces leaks and ensures a secure fit.
- If you're handy, select glue-up or clip systems that skip mortar—ideal for weekend projects.
- For renters or quick renos, choose lightweight panels under 50 pounds that don't require wall demo.
- Avoid kits needing full framing if your walls aren't square; they demand pro help and add $500+ in costs.
Always check for included hardware and trim kits to seal edges effectively.
Waterproofing and Sealing
Effective sealing prevents mold and water damage, a common regret for many installs.
- Look for kits with integrated flanges or overlapping panels that direct water inward.
- Use silicone caulk rated for wet areas on all joints—apply generously at corners.
- If installing over tile, ensure the kit has a smooth backing to avoid uneven adhesion.
Test for leaks after 24 hours by running water; reseal as needed for long-term reliability.
Style and Maintenance
Wall kits offer glossy, matte, or textured finishes to match your bathroom aesthetic while easing upkeep.
- Matte finishes hide soap scum better in high-use showers.
- Choose solid colors over patterns if you prefer simple cleaning with non-abrasive sprays.
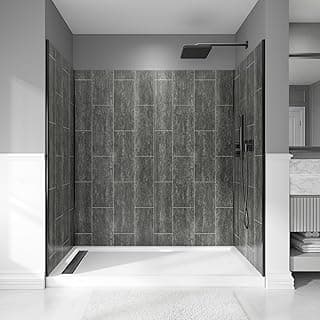
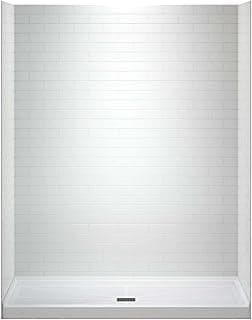
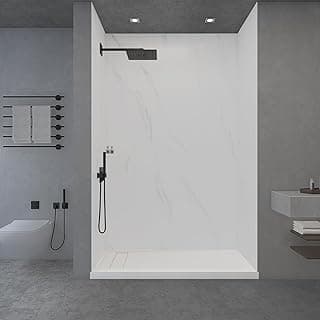
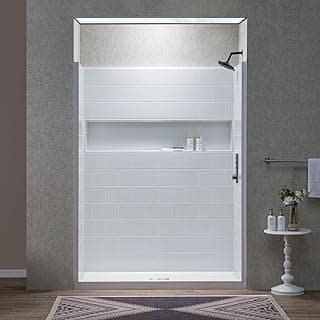
- For modern looks, subway tile mimics work without grout lines that trap grime.
Avoid highly textured surfaces if scrubbing is part of your routine—they can harbor bacteria if not rinsed thoroughly.
Cost and Value
Prices range from $200 for basic kits to $800+ for larger, feature-rich ones. Focus on total value over upfront savings.
- If replacing damaged walls, budget kits suffice for temporary fixes.
- Spend more on seamless designs if longevity matters—they cut repair costs over 10+ years.
- Factor in extras like doors or shelves, which add 20-30% but complete the enclosure.
Compare warranties—10-30 years on the structure indicates solid build quality.
Frequently Asked Questions About Shower Wall Kits
What are the best shower wall kits for bathrooms on a budget?
Affordable shower wall kits typically range from $200 to $600, depending on size and material, making them a cost-effective alternative to full tile renovations. In most cases, acrylic panels offer the best value since they resist mold without needing grout and install quickly over existing surfaces. If you're watching your budget, prioritize kits with pre-cut pieces to minimize waste and labor costs.
Are shower wall kits safe for families with kids or elderly users?
High-quality shower wall kits prioritize safety with non-slip textures on base components and smooth, snag-free surfaces that reduce injury risks. Opt for ones with reinforced edges and secure locking mechanisms if slip hazards concern you. They're generally safer than loose tiles, as they eliminate grout lines where water pools and mildew grows.
How easy is installation for shower wall kits in small bathrooms?
Most shower wall kits install in a weekend with basic tools like a drill and level, especially if you're covering an existing shower— no demo required. For small bathrooms, choose lightweight panels that snap or glue into place, cutting install time to under 4 hours for DIYers. If you're new to it, follow the included templates precisely to avoid leaks.
What makes some shower wall kits more efficient and low-maintenance?
Efficient shower wall kits use seamless acrylic or PVC materials that shed water quickly, preventing buildup and making cleaning as simple as a wipe-down with mild soap. They outperform tiled walls in moisture resistance, often lasting 10+ years with minimal upkeep. Look for ones with sloped designs to direct water flow and reduce standing puddles.
How do shower wall kits compare to tiling for bathroom showers?
Shower wall kits cost 50-70% less than professional tiling and install 5x faster, ideal if you want quick results without hiring pros. While tiles offer endless customization, kits provide uniform waterproofing without grout maintenance issues. Choose kits if durability and ease matter more than aesthetics in your daily routine.
Conclusion
Choosing the best shower wall kits for bathrooms comes down to durability, easy installation, and a design that fits your space and style. We've covered the key factors like material quality, water resistance, and maintenance needs to help you make an informed choice.
With the right kit, you can transform your bathroom efficiently and affordably. Take a moment to match these essentials to your needs, and you'll enjoy a reliable upgrade that stands the test of time. Your ideal option is ready to select.